


A well-structured home renovation timeline is the difference between a smooth, on-budget project and one plagued by delays, cost overruns, and frustration. Whether you’re a homeowner planning a remodel or a real estate investor renovating for resale or rental, creating a realistic renovation timeline helps you coordinate contractors, control costs, and manage expectations from start to finish.
This guide walks you step by step through how to create a practical, flexible home renovation timeline that works in the real world.
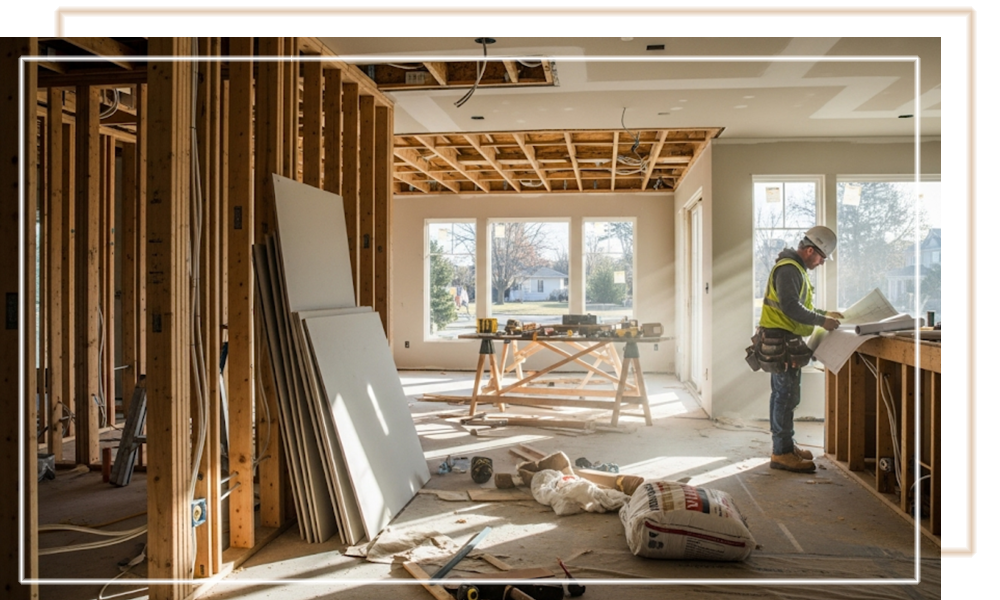
Why a Home Renovation Timeline Matters
Before diving into the steps, it’s important to understand why timelines are critical:
-
Keeps the project organized and tasks properly sequenced
-
Reduces downtime between trades
-
Helps control costs by avoiding rushed work or extended labor
-
Improves communication with contractors and lenders
-
Sets realistic expectations for completion
A timeline isn’t about perfection—it’s about preparation.
Step 1: Define the Scope of the Renovation
Start by clearly defining what you’re renovating. Be specific and realistic.
Ask yourself:
-
Which rooms or systems are being renovated?
-
Is this cosmetic, structural, or a full gut renovation?
-
Are you changing layouts, plumbing, or electrical?
Example scopes:
-
Cosmetic update: paint, flooring, fixtures
-
Mid-level remodel: kitchen or bathroom renovation
-
Full renovation: roof, HVAC, plumbing, electrical, layout changes
Your scope determines everything that follows—timeline length, budget, permits, and labor requirements.
Step 2: Break the Project into Phases
Every renovation should be broken down into logical phases. This makes the project easier to plan and track.
Common renovation phases:
-
Planning & Design
-
Design decisions
-
Contractor selection
-
Budget finalization
-
-
Permits & Approvals
-
Local building permits
-
HOA approvals (if applicable)
-
-
Demolition
-
Removing old materials
-
Structural demo (if needed)
-
-
Structural & Rough Work
-
Framing
-
Plumbing rough-in
-
Electrical rough-in
-
HVAC
-
-
Inspections
-
Required city or county inspections
-
-
Interior Finishes
-
Drywall
-
Flooring
-
Cabinets
-
Tile
-
Paint
-
-
Final Installations
-
Fixtures
-
Appliances
-
Trim and hardware
-
-
Final Inspection & Punch List
-
Corrections
-
Clean-up
-
Final walkthrough
-
Step 3: Estimate Time for Each Phase
Assign realistic timeframes to each phase. Avoid best-case scenarios—build in buffers.
Typical time estimates (general guidelines):
-
Planning & design: 1–4 weeks
-
Permits: 2–6 weeks (can vary by location)
-
Demolition: 3–7 days
-
Rough work: 2–4 weeks
-
Inspections: 1–2 weeks total
-
Finishes: 3–6 weeks
-
Final details: 1–2 weeks
A small cosmetic renovation might take 4–6 weeks, while a full renovation could take 3–6 months or longer.
Step 4: Sequence Tasks Correctly
Renovation tasks must follow a logical order. One trade often cannot begin until another finishes.
Key sequencing rules:
-
Demolition before construction
-
Structural work before cosmetic work
-
Plumbing, electrical, and HVAC before drywall
-
Flooring after major painting
-
Fixtures and appliances last
Improper sequencing is one of the most common causes of renovation delays.
Step 5: Coordinate Contractors and Trades
If you’re managing multiple contractors, coordination is critical.
Tips:
-
Confirm start and end dates with each trade
-
Build overlap buffers between trades
-
Avoid scheduling too many trades simultaneously
-
Keep written schedules shared with everyone involved
For investors, having a reliable general contractor can significantly streamline this step.
Step 6: Account for Material Lead Times
Material delays are one of the biggest renovation timeline killers.
Items that often have long lead times:
-
Cabinets
-
Custom windows or doors
-
Appliances
-
Tile and specialty finishes
Best practice:
Order materials before demolition begins whenever possible and confirm delivery dates in writing.
Step 7: Build in Contingency Time
Unexpected issues are inevitable, especially in older homes.
Common delays include:
-
Hidden water or mold damage
-
Electrical or plumbing issues
-
Failed inspections
-
Weather delays
Rule of thumb:
Add 10–20% extra time to your total renovation schedule as contingency.
Step 8: Create a Visual Timeline
Turn your plan into a visual schedule that’s easy to follow.
Options include:
-
Spreadsheet with dates and phases
-
Gantt chart
-
Project management tools
-
Shared calendar
A visual timeline helps everyone stay aligned and makes delays easier to spot early.
Renovations don’t fail—timelines do.
A clear renovation timeline can save time and money. Learn how to plan each phase of your home remodel from start to finish. Create a renovation timeline that reduces delays, controls holding costs, and protects ROI with smart sequencing and contingency planning.
Step 9: Monitor Progress Weekly
A timeline only works if it’s actively managed.
Weekly check-ins should include:
-
What was completed
-
What’s behind schedule
-
What’s coming next week
-
Any new issues or change orders
Adjust the timeline as needed, but always document changes.
Step 10: Final Walkthrough and Close-Out
The last phase is often rushed—but it shouldn’t be.
Final steps:
-
Complete punch-list items
-
Pass final inspections
-
Collect warranties and receipts
-
Confirm lien releases from contractors
A clean close-out protects your investment and ensures the renovation is truly complete.
Sample Renovation Timeline (8–10 Weeks)
-
Week 1–2: Planning, permits, material ordering
-
Week 3: Demolition
-
Week 4–5: Rough plumbing, electrical, HVAC
-
Week 6: Inspections and drywall
-
Week 7–8: Flooring, cabinets, paint
-
Week 9: Fixtures and appliances
-
Week 10: Final inspection and punch list

Final Thoughts
Creating a home renovation timeline isn’t about predicting the future—it’s about preparing for it. A detailed, well-sequenced timeline helps you reduce risk, control costs, and complete your renovation with confidence.
Whether you’re renovating your own home or managing multiple investment properties, the time spent planning upfront will pay dividends when the project is finished on time and on budget.
If you’d like help adapting this timeline for an investor-focused renovation or financing-driven schedule, this framework can easily be customized.
Start with a timeline. Finish with confidence.
YOU run the deal — we just fund it.
Turn your renovation vision into reality by setting clear, actionable goals that guide your project from start to finish.
Start Your Renovation the Right Way
Reach out to us @ 561-303-0334 if you require funding or have any questions.
FAQs
The timeline depends on the scope of work. Cosmetic renovations may take 4–6 weeks, while full home renovations often take 3–6 months or longer. Factors like permit approvals, material lead times, and inspection delays can extend the schedule.
The most common causes include permit delays, material backorders, failed inspections, and poor contractor coordination. Hidden issues such as plumbing, electrical, or structural damage can also add unexpected time.
Yes. Creating a preliminary timeline helps you set expectations, compare contractor schedules, and identify potential gaps. Once hired, your contractor should refine and confirm the final timeline.
A good rule of thumb is to add 10–20% contingency time to your overall renovation timeline. Older homes or major structural renovations may require additional buffer time.
This depends on the scope of work. Minor renovations may allow occupancy, but kitchen, bathroom, or full-home renovations often require temporary relocation due to safety, dust, and utility disruptions.
Inspections are required at various stages such as rough plumbing, electrical, and final completion. Failed inspections or scheduling backlogs can delay progress, so inspections should be planned into the timeline in advance.
Materials with long lead times—such as cabinets, appliances, windows, and specialty tile—should be ordered as early as possible, ideally before demolition begins.
Yes. Investors often prioritize speed and return on investment. Their timelines are usually more aggressive and may rely on pre-selected materials, repeat contractors, and faster financing to minimize holding costs.


